| Gene Prediction |
|
Contact: Tyler Alioto (tyler.alioto@crg.es) Back to the course homepage: /courses/IRB-INB07/
|
| Overview |
|
In this section we use several gene prediction programs on a particular genomic DNA sequence. For each of these programs we obtain a prediction of a candidate gene and we will analyze the differences between predictions and the annotation of the real gene.
The programs we are going to use are geneid and augustus which are available through a web interface.(If we had more time, we would also run genscan, fgenes, or as many gene predictors as we could...) In these, and in
many other tools in the web, we access a form where we can paste, or
submit, the sequence we want to analyze, and then we press a button in
the form that starts the computing process in some computer where the program
runs. Once this process is finished, we get a new page in
our browser with the results, which in this case should be a predicted gene.
|
| A genomic DNA sequence |
|
We are going to work with the sequence HS307871, which
is stored in FASTA format. This sequence contains one gene, annotated in the
following EMBL and
NCBI records. Try to identify in these
records the different pieces of information related to the annotation of the gene.
|
| geneid |
|
In order to use geneid follow these steps:
Please read the GeneID documentation (/software/geneid/docs/) if you need further clarification regarding input and output of geneid.
|
| augustus |
|
In order to use augustus follow these steps:
|
| Adding information to geneid and augustus |
|
Improve the prediction from some confirmed evidence.
|
| Viewing the annotations graphically |
|
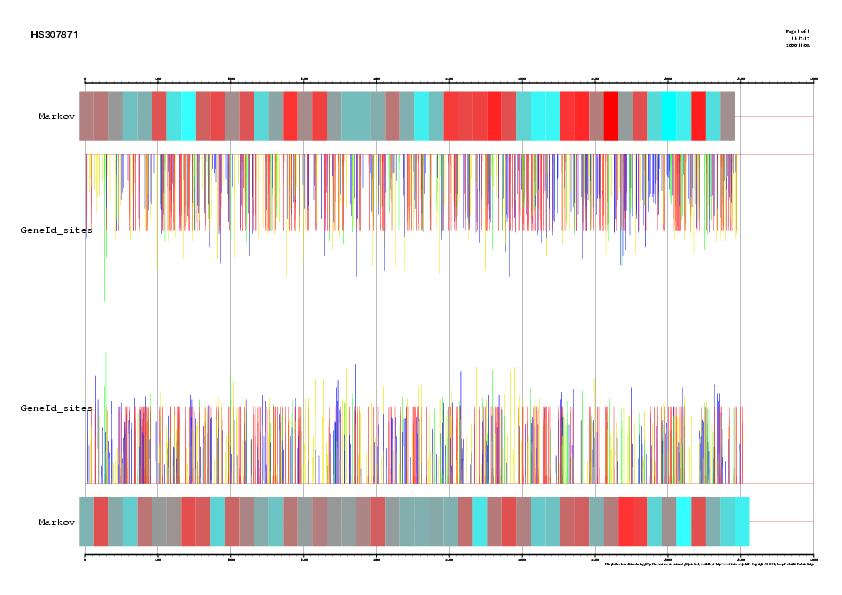
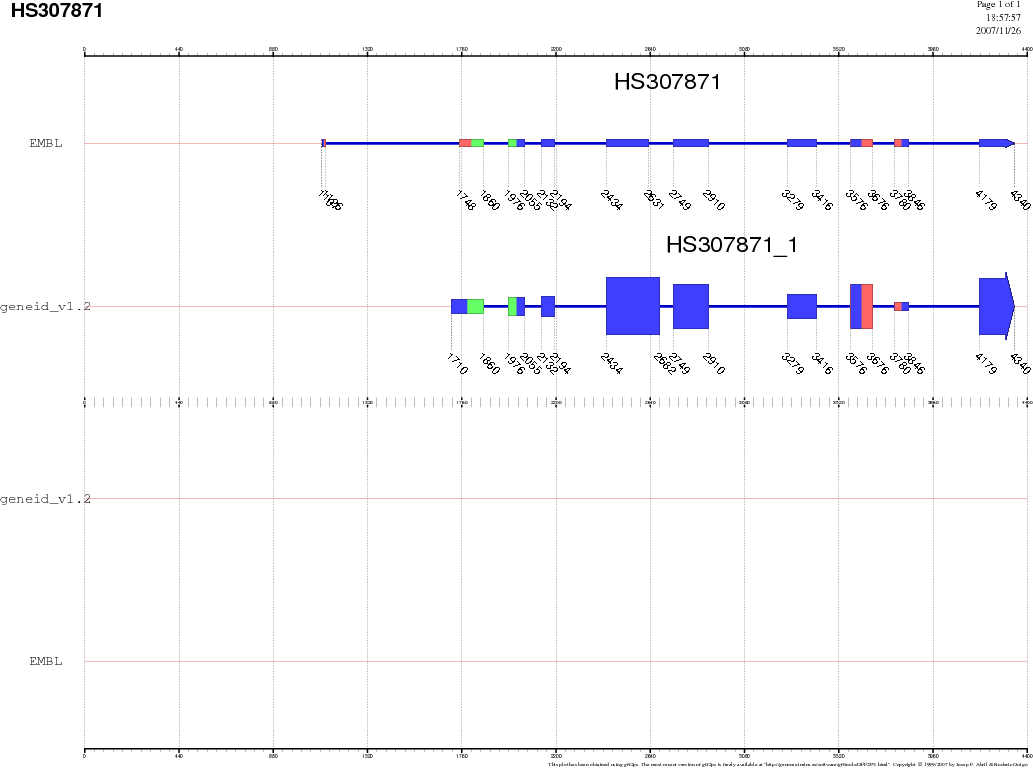
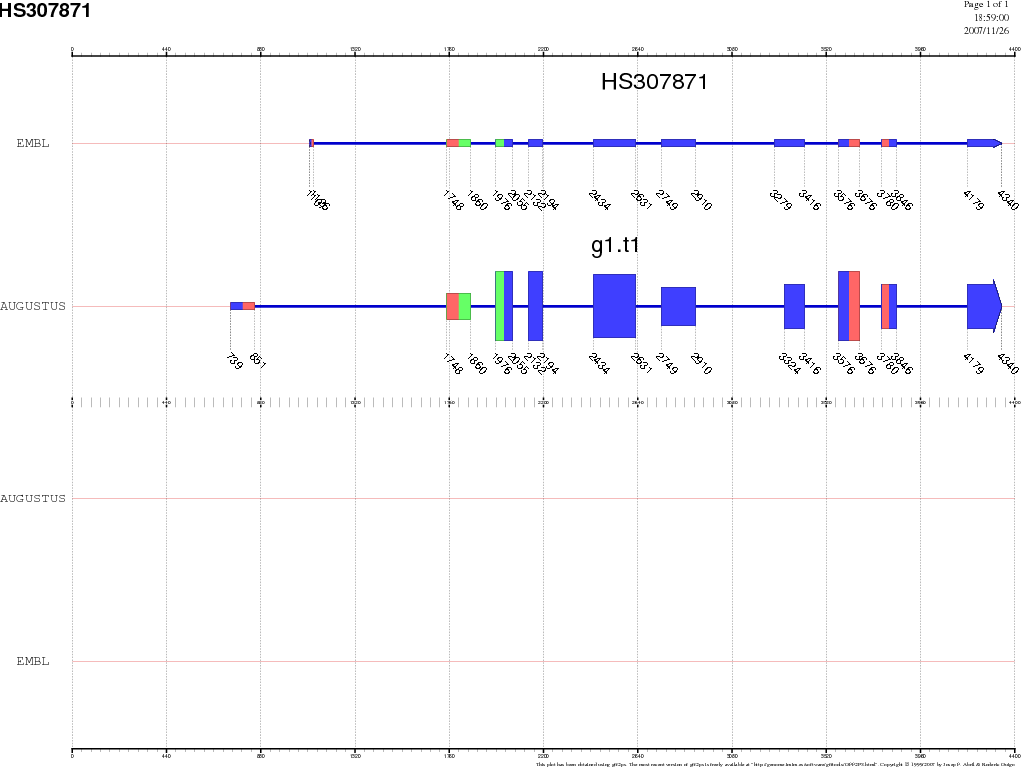
We can visualize all gene predictions made using the gff2ps webserver (http://bioweb.pasteur.fr/seqanal/interfaces/gff2ps.html). Upload the gff files for each of the predictions, as well as the EMBL annotation. For the impatient, here are the results. Go to the page where we saw the NCBI record, click on the link CDS, and, next to the Display button, unroll the menu box and select the display option FASTA. Now press the button Display, and we will obtain the protein-coding DNA sequence of this gene in FASTA format. You should now have this sequence. Select the entire sequence (first line is not necessary) and go to the UCSC genome BLAT search by goint to http://genome.ucsc.edu/cgi-bin/hgBlat. In the big text box, paste the coding sequence we just copied, and press the Submit button on the top-right corner of this page. The result is a single match, where we find two links, browser and details. Visit first the details link and try to understand the the information provided there. Then go backwards and visit the browser link where we will see where this gene is located within the Human genome, as well as other annotated information as EST spliced alignments, etc. |
| ...and only if you have time (which you won't)... |
| genscan |
|
In order to use genscan follow these steps:
|
| fgenesh |
|
In order to use fgenesh follow these steps:
|